Thursday, September 30, 2010

Need something to bring to mom's night out?

Picked this up today from Cost Plus for mom's night out tomorrow night! Couldn't resist the cute label. And the guy at the check out said it was actually pretty good. I'm still on my high from my flowers/chocolate yesterday that it certainly doesn't describe me, of course!

Wednesday, September 29, 2010

A sweet surprise!

I was ever so sweetly surprised today when my DH came home for lunch with these

and this in hand...........
.....FOR ME!

Sunflowers are just so, well, sunny! and brighten my kitchen and make me smile....the chocolate will have to wait until the kids are in bed, I don't wanna share!

Wishing you a sunny Wednesday!

Monday, September 27, 2010

Menu Monday

Thursday- Chicken Pot Pie- a surprise two-fer

I made this with what I had on hand, I hadn't been grocery shopping in over a week.

2.5 ish pounds boneless chicken, cooked, cubed (I used thighs (10)cause they are so tasty, but breasts work well too) I BBQd mine with s/p
1 yellow onion, chopped
2 shallots, chopped
1 stick butter (I know!)
3/4 cup flour
5 cups chicken broth, hot
2 tea salt
1/2 tea pepper
1/4 cup heavy cream (I know, again!)
3 carrots, chopped
5 stalks celery, chopped
10 oz frozen peas
couple sprigs fresh rosemary, it's what I had, but parsley would be good
2 pack Trader Joe's pie crusts, thaw for 60 min. at room temp.,

Melt butter in a heavy saucepan and saute onions and shallots until translucent, about 10-15 min. Add flour, over low heat and whisk constantly for 2 minutes. Add broth, simmer on low for 2 ish minutes until thickens a bit, stirring. Add salt, pepper and heavy cream. Add cubed chicken, carrots, celery, peas and rosemary.

Place 1 pie crust in pie dish, smooth sides and trim any parts hanging over. Pour chicken mixture in. Cover with 2nd pie crust, pinching the two pie crusts together at the edges. Cut a few holes in the top to let the steam out. Bake at 425 for 30 minutes. Let stand 10 min. before cutting.
Now, I can't do this if I try...but, the amounts I used ended up making enough for me to make 2 whole chicken pot pies! I wasn't prepared for this. So I poured the rest of the chicken mixture into a bowl to freeze. Now I just need to buy another pie crust and I'm all set for a second night of chicken pot pie, sans the work!

Friday: Caprese salad toasts and BBQ Flank Steak

Today we were introduced to the wonderful Draper Farm. It's really an incredible idea that I was so excited to learn about. Membership is free and after you attend a 1 hour orientation, you are allowed to go tot the farm at any time and pick your own organic vegetables. It's like having a farmer's market available 24/7. About a 15 min. drive from our house, you park at the end of a cul-de-sac and would have no idea it was there unless you knew about it. It's just in the middle of a residential neighborhood. We picked some super sweet tomatoes, green beans, chard, and summer squash.
Then from our own garden I picked a handful of basil and assembled a plateful of Caprese Salad bruschetta toasts. I also BBQd a flank steak (which I forgot to take a pic of)

Saturday Morning- French Toast

Using homemade bread from Uncle Bob, I made our standard french toast:
eggs
milk
syrup (in the batter)
cinnamon
butter for frying pan
powdered sugar for sprinkling


Saturday dinner: Chow Mein w/teriyaki beef, Draper Farm green beans, and rice (for my DH)

Noodles from Costco
beef pre-cut from Trader Joe's
Trader Joe's Very Teriyaki sauce/marinade
Draper Farm beans
Jasmine white rice

Sunday dinner: Gnocchi with butter sage sauce, chard, BBQ flank steak (leftovers)


Whole wheat/potato gnocchi from Trader Joe's, cooked according to package.

Sauce:

3 TBS butter melted in saucepan, add 5 minced garlic cloves, 10 fresh sage leaves, chopped, and sprinkle with some salt. Cook for about 5 minutes until sage is sizzling and garlic is soft. Add drained gnocchi and fry gnocchi for about 4 more minutes.

Chard: cook for about 15 min. over medium heat with olive oil and garlic, add salt at the end (I also added some red pepper flakes for those who like it with a little kick)

And the steak, microwaved left overs from Friday night.

Monday: Pizza Night!

Smoky Veggie Pizza

Trader Joe's uncooked pizza dough, cooked for about 12 minutes before topping
Trader Joe's pizza sauce (in refrigerator section near dough)
Smoked mozzarella cheese (can find it at Trader Joe's!)

Saute in olive oil: 5 cloves garlic, half red onion chopped, 6 oz. crimini mushrooms chopped, handful of broccoli rabe chopped, salt and pepper.

Spread sauce on pizza crust. Sprinkle about half the cheese over the sauce. Spread sauteed mixture on top. Sprinkle rest of cheese. Bake at 450 for about 12 minutes.

Meat Lover's Pizza (aka- the one for my husband)

Trader Joe's pizza dough
Trader Joe's pizza sauce
pepperoni
Italian chicken sausage, casings removed, cooked
Mozzarella cheese
Oregano, dry

Pretty self explanatory! 450 for 12 minutes (after baking dough without toppings for 12 minutes, of course)
And I served a side salad of arugula and sweet mustard greens, abundant in our garden right now, with Draper tomatoes.

Sunday, September 26, 2010

Yummy Kitchens
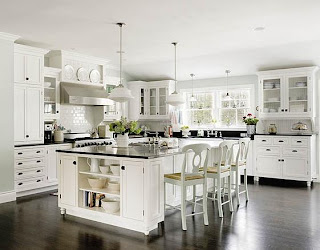
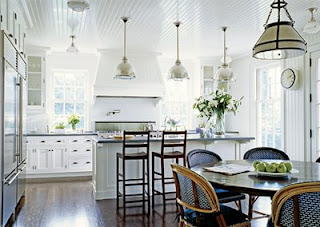
I am trying to make a few decisions for my kitchen so I was browsing around on blogs and such looking for inspiration.

This is my ultimate dream kitchen. (Sorry, I can't find the source.)
And this one, a Victoria Hagen kitchen, I just love the beadboard ceiling:

above picture curteousy of Willow Decor

who also has a beautiful kitchen herself:

More to come.......

Wednesday, September 22, 2010

My fall garden

I decided at the end of this last summer that I would try my hand at gardening. Not entirely sure why I picked fall as the time to plant my first garden, my thumb is the same color as the rest of my fingers.......but it's actually growing and we are getting to eat from it!
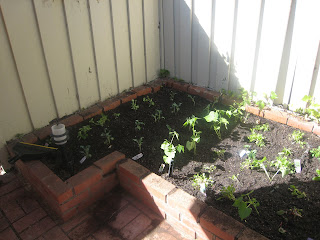
We picked a small raised bed in our front courtyard. It is only about 3 feet by 6 feet, so I don't get too overwhelmed at first! It already has a sprinkler system set up inside, so I figured it was a good place to start.

First the kids and I cleared out all the weeds and spring bulbs in the dirt...boy were there a ton of bulbs. Somehow I don't remember all those flowers popping up each spring. We saved them all in a dark place in the garage....well no, we haven't quite done that yet, actually. We plan to save them all in a brown bag for right now they are still sitting on the work bench, oops.

Next we added a bag of starter compost and some organic vegetable starter fertilizer. The mixing was fun and super dirty! Oh and the courtyard stunk for weeks! The compost smelled "disgusting", I was reminded each time someone walked out the front door.

Then we hit the nursery to buy our plants. A nice gardener helped us pick the easier to grow plants and suggested for our first time that we plant already started plants instead of trying to sprout seeds. (I think he took one look at the 3 rascals having a shopping cart derby through the outdoor aisles of the nursery and figured I didn't have time to baby sprouts in my window sill for weeks.) We came home with: sugar snap peas, broccoli (more on this later), bush beans (no time to deal with poles for pole beans), arugula, chard, sweet mustard greens, sweet peppers, basil and cucumber. Wow, that's a lot for a 3x6 space! We dug out rows and started planting.

Once it was all in the ground, I decided that would be a good time to test the sprinklers. In retrospect, should have tested them before bringing home all my little "babies". So there was one sprinkler that was gushing from underground, two sprinklers without spray heads and one section not getting water. Darn! So I turned off the sprinkler system and watered by hand for a couple of weeks.

Finally I discovered soaker hose. Yay! Sprinklers soon to be back in business. So I fixed all the broken pipes, including digging a 9 inch deep hole to get to one of them, and attached soaker hose all the way around the garden. Freedom.

And now all there was left to do is wait........well kinda.
About 4 weeks in I found a few aphids on the arugula. Darn! The only kind of aphid spray I knew of was a super harsh poison that would defeat the whole point of my organic garden. So I googled it, of course. I discovered that the best things for aphids are "green lace wings". They are a bug that love to eat aphids. Supposed to be better than ladybugs. There are all these websites that will sell them to you...and they're not that expensive, about $10 for a huge bag that will easily be enough for my small garden. But it turns out you have to keep them cold to keep them alive (well, it's just the larvae they are sending you) and therefore need to be overnighted........cha-ching....the price just jumped to $28! Eeek. My money saving garden is about to cost me more than the organic booths at the farmer's market. So I decided to try our local nursery. I get there 5 min. before they open, the chain fence is still up blocking their parking lot, so I wait in the driveway, in position to be first to enter, like it's Norstrom's Anniversary Sale. The guy opens the gate and we all pour out of the car.....they guy must be thinking what is this silly lady doing here at the crack of dawn with her children, so anxious to get in! Well anyways, they had the green lace wings! Hoooray! And then I turn the bag over and see the price tag, $25. What? Seriously. I hand them back to the guy and thank him but tell him I'm going to pass. And we all load back in the car.
Ok, plan B. Google says: soapy water, sprayed on each and every leaf. Wow, that sounds like a serious ordeal to turn every leaf and spray with soapy water. But I have to save my garden! The websites suggest doing this weekly. Ok, gardening is suddenly not as appealing. But I do it, I spray down each leaf, some twice. It only takes me 10 min., what was I complaining about? And in a few days, they were gone, every last one of them. By the time I did the spraying, there were thousands of aphids on every single plant and just a few days later, gone, completely. I continued to check back and never saw them again.....so as of now, I've not sprayed again!

Ok, drum roll please..............and finally, 6 weeks after planting, we harvested our first crop! We picked green beans and arugula and mustard greens, having plenty to feed all 5 of us, including two very hearty salads.

I steamed the beans for just a couple minutes, leaving them al dente. And I made two large salads with the greens and a simple oil/vinegar/s/p dressing. The kids devoured their beans in under 2 minutes, asking for more. Then they tried my salad and practically attacked me for it! I'd say it was a huge success. They look forward to picking more tomorrow night.

Since then we've picked arugula almost daily for our sandwiches or small side salads at dinner.

Ok, this post is getting long, but I still have more to tell you! So I had been waiting and waiting for my broccoli to start sprouting its crowns. Was this like carrots and they grow underground, no, right? Well where are the crowns? The leaves were huge, the plants were the tallest in the garden, shading the little carrot seeds I threw in for good measure. So then I looked at the tag and googled the name: broccoli spigariello. Turns out it's some prized California heirloom broccoli rabe, in which you eat the leaves! It doesn't grow crowns at all. The leaves taste like a sweeter version of broccoli. Who knew? And I guess people go crazy when they see it at the farmer's market....the website said to buy it up like crazy whenever you can. So the kids and I went on a harvest spree and picked tons and tons of leaves.

I cooked them in some olive oil until slightly crispy, then sprinkled on pepper and pink salt (a house fave) and drizzled on a tad bit of honey. Again, everyone was begging for more! So the next night, we had it all over again. And then again! We have a ton of broccoli spigariello, maybe I should start selling it at Lucas's lemonade stand.

Monday, September 20, 2010

And this is what my house looks like after blogging

My girls are just fine with me spending time blogging. They play so beautifully together. Being a twin, it's so nice to have your best friend over for a playdate 24/7.
I just have a little work to do when I finish blogging for the day.

The playroom (aka their store): My bedroom (aka their house)

I discovered chalkboard paint!

I've had several blog posts planned and just hadn't published them yet...so today is my day to publish the ideas I've been working on. (Today is also the first day on my calendar that is completely white, not a thing written in today!)


Thanks to Michelle at Sweet Something Design, I have gotten very inspired to paint. (Like I needed inspiration for that.) She has great posts on painting lamps and vases and all sorts of stuff, plus she loves chalkboard paint and now I know why! She has some wonderful ideas and is so creative. Be sure to check out her blog!
Sweet  Something Designs

My first two projects were the side of a kitchen cabinet and the side of our entry cabinet. The kitchen cabinet is for me! I get to write whatever I like on it, it's not at kid height! The entry cabinet is for the kids.

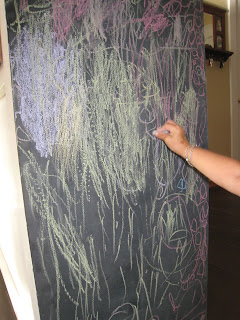
I cleaned the surfaces with a damp cloth. Then I rolled on the paint! No primer, no sanding, just used a foam roller and rolled it on. Two coats, 4 hours to dry between. We did the first coat in the 20 min. we had before soccer practice! Then for 3 long days the kids kept asking when it was ready to use...there is a 3 day wait period. When my son came home from school on the 3rd day he was quick to remind me this was the end of the 3rd day and it's time to color! So all 3 kids grabbed chalk at the same time and went to it. I was quite impressed, though....they divided the very narrow space (21 inches wide by 36 inches high) into 3 sections and each colored on their assigned area!

I got to try it:

Then the kids took over:

In the kitchen:
....and next step (there's always a next step)-find dustless chalk!!

Now I'm going to work on my chalkboard handwriting skills!

Sunday, September 19, 2010

Bathroom is almost finished!

Hi! Wow, sorry for the break in posts, but with the end of summer and beginning of a new school year, it's taken me a while to get back into routine. So we are almost finished with the bathroom! The only things left are a shower door and beadboard. Yay! It's looking just the way we envisioned it and we couldn't be happier. Plus, it's so nice to have a 2nd bathroom...there were times that 5 of us and the dog were all crammed into the kids' bathroom, it was really comical. So without further ado, here's the bathroom!


The Vanity Area:
Vanity- Restoration Hardware Hutton espresso
Counter & backsplash- carrara marble, 3cm honed
Faucets- Costco.com brushed nickel
Mirrors- Restoration Hardware Asbury brushed nickel
Sconces- Restoration Hardware Asbury brushed nickel


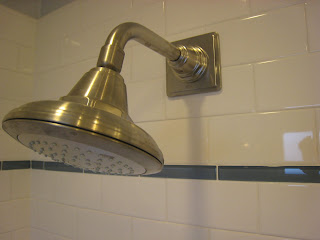
The shower:
Walls- 3x6 subway tiles, polished white
Accent tile- Akdo light Caspian blue, 1x6
Floor- 2inch white hex, matte
Curb and top of pony wall- Carrara marble, 3cm honed
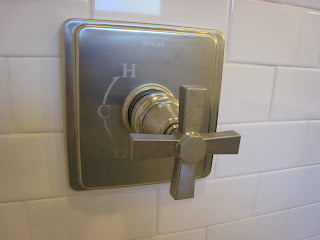
Faucets- Kohler Pinstripe, brushed nickel
I'm not showing you our W/C area as the toilet is ugly! It's the original, which is almond color. It's a great toilet, actually, a Toto....but needs to be replaced one day for something prettier!

And we aren't totally thrilled with the paint color, a little too baby boy like and also with a hint of purple (no good!) So we're working on finding a new paint color. We'll put beadboard in to the chair rail height, painted bright white like the rest of the trim: BM Chantilly Lace.
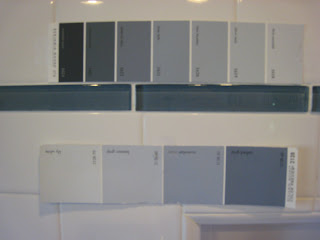
UPDATE: I finished the wainscoting! 
 
UPDATE to the UPDATE!  DH put new window and door trim up and I love it! As soon as I get the last coat of paint up there, I'll post a before the final final post (still need to install the shower door!)
 
I linked to The Lettered Cottage Best Room Redo of 2010!